For fiberglass boat owners, spider cracks are a common issue that requires attention. Though they may appear innocuous, these small cracks can lead to more significant problems if left untreated.
Spider cracks can form for various reasons, ranging from regular wear and tear to more severe impact damage.
In this comprehensive guide, we will explore the nature of spider cracks, including their appearance, causes, and common misconceptions. Furthermore, we will provide a step-by-step process for repairing these cracks and offer valuable advice on preventing their recurrence. Join us as we navigate the intricacies of maintaining a fiberglass boat free of spider cracks.
Understanding Spider Cracks in Fiberglass
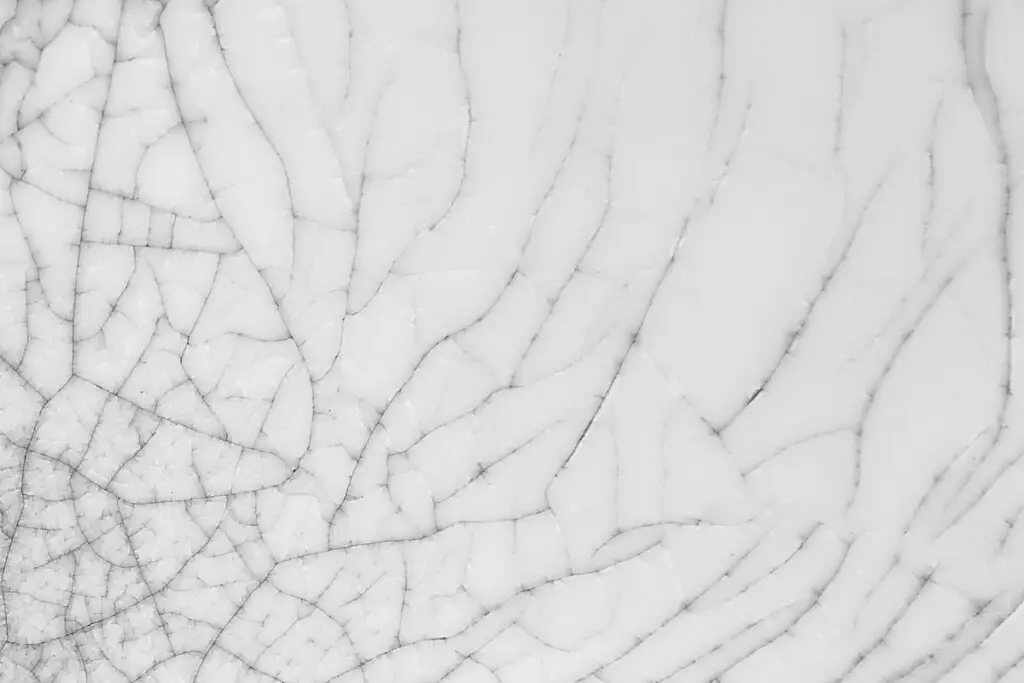
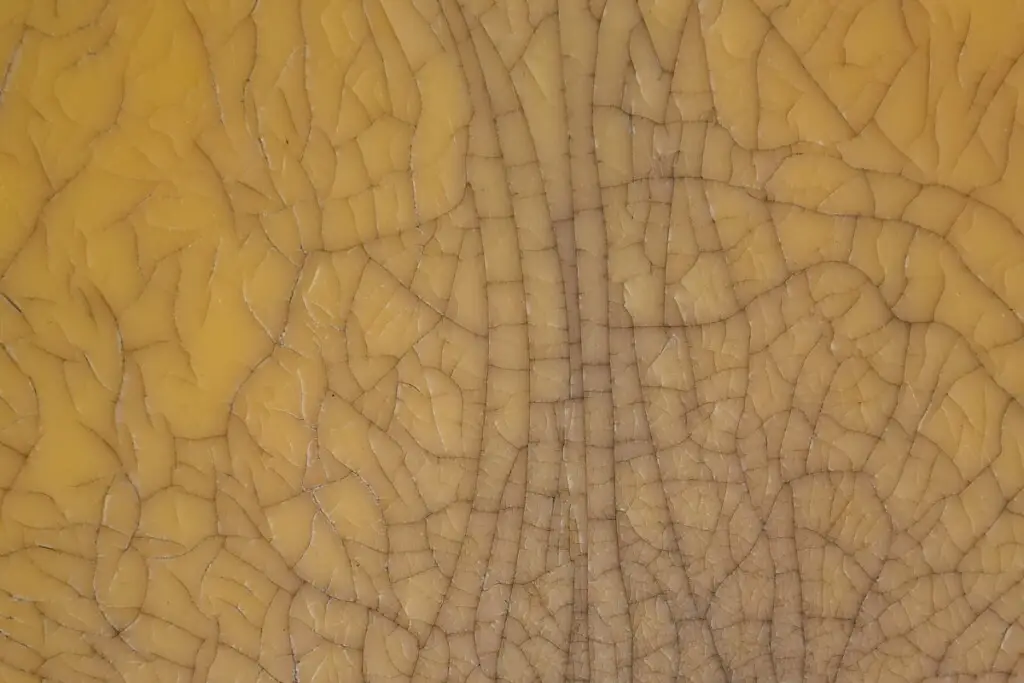
- What are spider cracks? Spider cracks are hairline fractures that appear on the surface of the gelcoat or fiberglass of your boat. They typically form in a web-like pattern, giving them their “spider” moniker.
- What do they look like? Spider cracks are thin, branching lines that radiate outward from a central point. They can range from a single crack to a dense network covering a larger area.
- Common causes: Spider cracks can be caused by various factors, including stress on the fiberglass, impact, improper construction, or simply aging of the material.
- Misconceptions: Some people may believe that spider cracks are merely cosmetic issues, but they can indicate underlying structural problems. If left unaddressed, they may lead to more severe damage over time.
Preparations Before You Repair Spider Cracks
- Identify the cause: Determine the root cause of the spider cracks. They may result from stress, impact, manufacturing defects, or other issues. Identifying the cause can help you take appropriate preventive measures.
- Inspect the area: Carefully examine the area around the spider cracks to check for any structural damage or weaknesses that may have contributed to the cracks’ formation. If you suspect any structural issues, it is essential to address them before repairing the cracks.
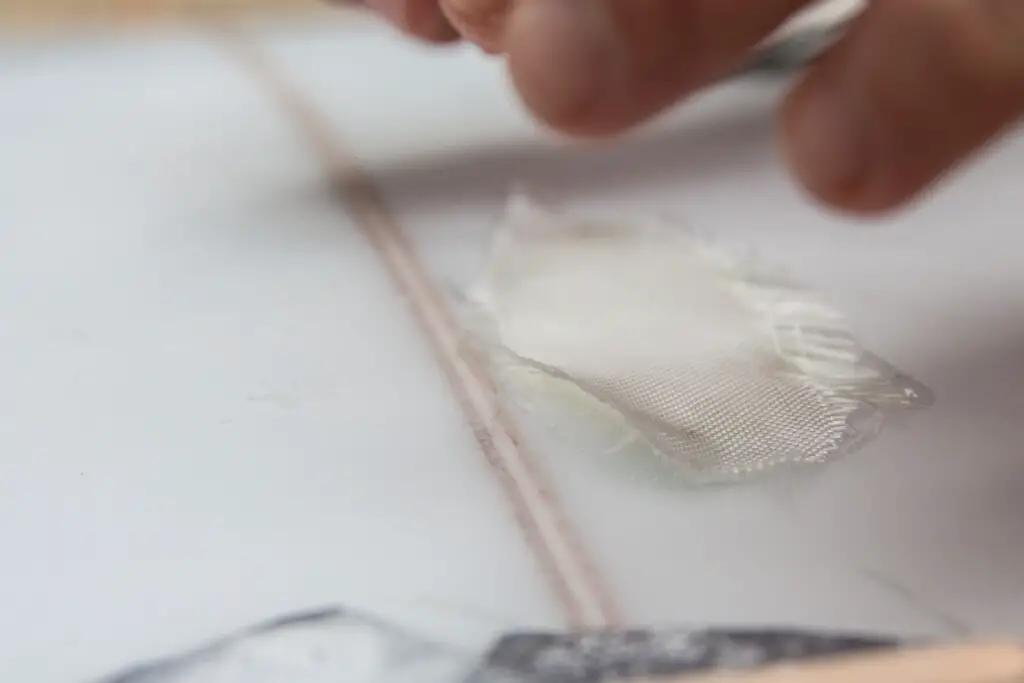
- Reinforce the area (if necessary): If the spider cracks are due to structural issues, you may need to reinforce the area by adding extra layers of fiberglass and resin or using a fiberglass repair kit designed for structural repairs. This process may involve applying fiberglass mat or cloth to the area and laminating it with resin to strengthen the weakened section.
- Address stress points: If the spider cracks are due to stress on the fiberglass, consider redistributing the load on the boat or modifying the boat’s structure to minimize stress in the affected area. This might involve repositioning heavy equipment or adding support structures to the boat.
- Inspect hardware and attachments: Make sure that any hardware or attachments in the area are properly installed and not causing stress on the fiberglass. Tighten or replace any loose or damaged hardware, and ensure that any through-bolted fittings are adequately backed with backing plates to distribute the load.
- Prevent future impacts: If the spider cracks are due to impacts, take precautions to avoid future damage. This might include using fenders or bumpers to protect the boat’s hull or being more careful when maneuvering in tight spaces.
By addressing the underlying issues and reinforcing the affected area, you can help prevent spider cracks from recurring after repair.
Repairing Spider Cracks
- DIY repair: For small spider cracks, you can often perform a DIY repair using a fiberglass repair kit (Amazon). These kits typically include resin, hardener, fiberglass cloth, and other necessary materials. Follow the manufacturer’s instructions carefully to ensure a successful repair.
- Clean the area: Before starting the repair, thoroughly clean the area around the spider crack to remove any dirt, debris, or wax. You can use soap and water, a fiberglass cleaner, or acetone.
- Sand the area: Lightly sand the area around the crack using fine-grit sandpaper (e.g., 220-grit) to remove any surface imperfections and create a smooth surface for the repair. Be careful not to sand too deeply, as this can cause further damage.
- Apply the filler: Mix a fiberglass filler according to the manufacturer’s instructions. Fill the crack with the filler using a plastic spreader or putty knife, ensuring it is pressed firmly into the crack. Apply enough filler to slightly overfill the crack, as it will shrink as it cures.
- Allow the filler to cure: Wait for the filler to cure according to the manufacturer’s recommended time. The curing time may vary depending on the filler and the ambient temperature.
- Sand the repair: Once the filler is fully cured, sand the area smooth using progressively finer grits of sandpaper, starting with 220-grit and moving up to 400-grit or finer. Be sure to blend the repair into the surrounding area to create a seamless finish.
- Apply gelcoat: If the repair is visible, you may need to apply a gelcoat to match the original color and texture of the fiberglass. Clean the area with acetone, then apply the gelcoat according to the manufacturer’s instructions.
- Sand and polish the gelcoat: After the gelcoat has cured, sand it smooth with progressively finer grits of sandpaper, finishing with wet sanding using 800-grit or finer. Then, buff the area with a polishing compound and a buffer to restore the shine.
- Wax the repair: Finally, apply a high-quality marine wax to the repaired area to protect the finish and blend it with the surrounding surface.
- Professional repair: If the spider cracks are extensive or in a critical structural area, it’s best to consult a professional for repair. They’ll have the expertise and equipment needed to properly address the issue and ensure your boat’s integrity.
Preventing Spider Cracks
- Regular inspections: It’s essential to perform regular inspections of your boat to identify any signs of spider cracks or other damage. Catching issues early can help prevent more severe problems down the line.
- Gelcoat maintenance: Proper care and maintenance of your boat’s gelcoat can go a long way in preventing spider cracks. Be sure to clean, polish, and wax your boat regularly to protect the gelcoat and keep it looking its best.
- Avoid hard impacts: While it might seem obvious, avoiding hard impacts with docks, rocks, or other boats can help minimize the risk of spider cracks. Always be mindful of your surroundings and navigate with caution.
- Use proper lifting techniques: When lifting your boat out of the water, ensure that you’re using the proper techniques and equipment to avoid causing undue stress on the hull, which could lead to spider cracks.
- Store your boat correctly: Proper storage of your boat, both on land and in the water, can help prevent spider cracks. Make sure to support the boat evenly and avoid any unnecessary stress on the hull.
By understanding, repairing, and preventing spider cracks, you can ensure that your fiberglass boat stays in tip-top condition. Remember, regular maintenance, inspections, and prompt repairs are key to keeping your boat looking and performing its best.
Happy boating!